M&M cookies

I love m&ms, so how could I go wrong with m&m cookies? I can't!  I found these delicious things over at Picky Palate. They are defiantly a keeper. 


Ingredients:
1 stuck undated butter, softened 
1/2 cup sugar
1/2 cup packed brown sugar
1 large egg
1/2 tsp vanilla
1 1/2 cups flour
3 tablespoons vanilla instant pudding
1/2 tsp baking soda
1/2 tsp salt
3/4 cup mini chocolate chips
1-1 1/2 cups mini m&ms

Directions

  1. Preheat oven to 350 degrees F. and line a large baking sheet with a silpat liner or parchment paper.
  2. In a large mixing bowl cream your butter and sugars until well combined. Add your egg and vanilla mixing to combine. Add your flour, pudding mix, baking soda and salt, stirring to combine. Add chips and m and m’s stirring to combine.
  3. With a medium cookie scoop, place dough 1 inch apart from each other. Bake for 10-12 minutes until cooked through. Let cool on cookie sheet for 10 minutes before transferring to cooling rack.  

Peanut Butter Cup Ice Cream Cake

For my sons 9th birthday he wanted an ice cream cake!  I got the basic recipe from 

  • 1 box of brownie mix(ingredients list on back)
  • 1/2 gallon of ice cream (I used vanilla)
  • Mini peanut butter cups (cut in half)
  • Hot Fudge Sauce
  • Caramel Sauce
  • Pint of whip cream, whipped
Instructions
  1. Bake brownies according to the box into a 10.5 inch spring form pan. Cool.
  2. Cover with a layer of hot fudge sauce.
  3. Unwrap candy and cut into quarters. Set aside enough to sprinkle on the top at the end. Soften ice cream and add candy into ice cream. Spread on top of brownie/hot fudge layer and return to the freezer to harden up.
  4. Before serving whip the cream. Remove the sides of the spring form pan and spread whipped cream on top. Drizzle with more hot fudge sauce and caramel sauce and top with remaining candy. Can return to the freezer or serve immediately. Enjoy!

Hot Fudge Recipe From  Your Home Based Mom

Mom’s Hot Fudge Sauce
2 C chocolate chips (your choice – dark, semi sweet or milk)
1 can  (1 1/3 C) evaporated milk
1/2 C butter
2 C powdered sugar
1 tsp vanilla
Melt chips, butter, milk and powdered sugar.  Bring to a boil.  Cook for 4 minutes – stirring constantly.  Take off heat and allow to thicken.  Add vanilla

This cake was a huge hit, I kind of wished I had made more so I could have seconds!!!  

BBQ Ribs

These ribs may take ALL day to cook, but it is SO worth it. De-lish!


Ingredients:
  • 8 country-style pork ribs 
  • Dr. Pepper cola, not diet 
  • 5 garlic cloves, slightly smashed
  • 1 tablespoon liquid smoke
  • 1 large onion, quartered 
  • your favorite barbecue sauce (I used Sweet Baby Rays)
Directions:
  • Place ribs in crock pot and pour Dr. Pepper over ribs to cover. 
  • Add garlic, liquid smoke and onion.
  • Cook on HIGH 2 hours, then LOW for 4 hours.
  • Place ribs in baking pan and pour BBQ sauce over ribs.
  • Bake at 350 degrees for about 30 to 45 minutes. Or they can be put on BBQ grill.

Chocolate Chip Cookies

There are a MILLION different recipes for CC cookies, but this one is the best I've had. A must try.

I didn't take any pictures, because I figured most of you out there know what a CC cookie looks like. :)

Ingredients:
  • 1 1/2 sticks of butter (12 Tbsp)
  • 3/4 c white sugar
  • 3/4 c brown sugar
  • 1 egg
  • 1 tsp vanilla
  • 3 Tbsp milk 2 1/2 cup flour
  • 1 tsp baking powder
  • pinch of salt
  • 1 c choc. chips
Mix it all together.
Bake at 375 degrees 10-12 min.

Pour yourself a glass of milk, and good luck not eating them all! :)

Oreo Pudding Cookies

Oreo Pudding Cookies
source: The Girl Who Ate Everything
Ingredients:
1 cup butter, room temperature
3/4 cup brown sugar
1/4 cup white sugar
1 (4.2 ounce) package instant Oreo Pudding mix (see Note)
2 1/4 cups flour
1 teaspoon baking soda
2 eggs
1 teaspoon vanilla
1/4 teaspoon salt
2 Hershey's Cookies N Cream Candy Bars broken into small pieces (I used 2.6 ounce King Sized bars)
2 cups semi-sweet chocolate chips


Instructions:
Preheat oven to 350 degrees.

Combine flour, baking soda, and salt in a small bowl and set aside. Cream together butter and sugars. Beat in pudding mix until blended. Add the eggs and vanilla and mix well. Add the flour mixture and mix to combine. Stir in cookies n' cream pieces and chocolate chips. Batter will be thick.

Using a cookie dough scooper, place golf ball sized dough balls on a baking sheet lined with parchment paper. Bake at 350 degrees for 8 minutes. You do not want to over bake these! Let cookies cool for 5 minutes on baking sheet before moving to a cooking rack.

Note:  I had to cook my cookies about 1 min longer.

Oreo Fluff

Another super easy recipe, and great for those family gatherings. I've seen a million different recipes with different measurements, and some with one or two different ingredients, an all still called OREO FLUFF. But I will post the one I used, because it was SO DELICIOUS! The family literally licked the bowl clean!

And since my attempt of taking a picture that involved a pudding salad did not look all that appetizing (even though it truly is the BEST!)... I'm going to borrow some pics from the web world. They are pics of the many different variations of the FLUFF, and I'm sure all are delicious. (links included)

This is the recipe I used:

Ingredients:
  • 2 (small) boxes instant vanilla pudding
  • 2 3/4 cup cold milk
  • 8 oz Cool Whip
  • 1 package Oreos (I only ended up using about 1/2 of the smashed Oreos.)
Directions:
  1. Beat the pudding and milk until it starts to thicken.
  2. Refrigerate for 15 mins. Crush Oreos in this time.
  3. Fold cool whip in with pudding. 
  4. Add crushed Oreos. As much/little as you want.
  5. Refrigerate for at least 2 hours or overnight. (If you do overnight, I'd suggest not adding Oreos til a couple hours before planning to eat. That way they won't get too soggy.)

Great presentation! But I didn't mash my oreos this small. I kinda like to have them chunky.  
Find this variation HERE.


 This looks more like what I made. This recipe is from HERE.

 This looks so pretty! Find this one HERE


Macaroni Grill Rosemary Bread

I love the Macaroni Grill, the bread there is amazing.  The last time I went I think I ate two loafs myself!!  It's that good!!  I found this recipe at melskitchencafe.com so I had to try it!!  Everybody loved it.  My kids told me it was better then the Macaroni Grills...
Macaroni Grill Rosemary Bread
*Makes 2 loaves
INGREDIENTS:
1 tablespoon instant yeast or 1 1/2 tablespoons active dry yeast
1 tablespoon sugar
1 1/2 cups warm water
2 3/4 – 4 cups all-purpose flour
1 1/2 teaspoon salt
1 1/2 tablespoons dried rosemary, chopped and divided
2 tablespoons butter, melted
Coarse salt for sprinkling
DIRECTIONS:
In a large bowl (or the bowl of an electric stand mixer if you have one), combine the yeast, sugar and water. If using active dry yeast, let the mixture stand until foaming and bubbly, about 5 minutes. If using instant yeast, proceed with the recipe. Add two cups of the flour, salt and 1 tablespoon of the chopped rosemary. Mix. Continue adding flour, gradually, until a soft dough is formed. Judge the dough based on texture and feel versus how much actual flour you’ve had to add based on the recipe. The dough should be slightly tacky to the touch but should hold it’s shape while still being soft and smooth. Knead the dough by hand or with an electric mixer for 4-5 minutes, adding additional flour only if the dough is overly sticky and not clearing the sides of the bowl.
Transfer the dough to a lightly greased bowl and cover with greased plastic wrap. Let the dough rise until doubled in size, approximately 1-2 hours, depending on the warmth of your kitchen. Once doubled, gently deflate the dough and divide in half. Prepare a rimmed baking sheet with parchment paper, a silpat liner or lightly grease with cooking spray. Shape the dough into two smooth, oval shaped loaves and place them on the baking sheet, one on each half of the tray so they have room to rise and bake without touching. Use a brush to slather the melted butter over the top of the loaves. Continue brushing on the butter until it is gone (the loaves will be well-saturated). Sprinkle the remaining chopped rosemary over the top of the loaves, patting down gently to set into the dough, if needed. Cover the loaves with lightly greased plastic wrap and let them rise again until puffy and nearly doubled, about an hour (again, the exact time will depend on temperature so judge the dough by how it looks).
Preheat the oven to 425 degrees. Lightly sprinkle coarse salt over the top of the loaves. Bake the loaves for 18-20 minutes until browned and baked through. Transfer to a cooling rack to cool completely.

Key Lime poke cake

For Mothers day dinner I decided to make the dessert. I decided on this Key lime poke cake!  It was yummy and light and just the right summer taste to it!!

  • 1box Betty Crocker® SuperMoist® white cake mix
  • 1 1/4
  • cups water
  • 1tablespoon vegetable oil
  • 4eggs
  • Key Lime Filling
  • 1can (14 oz) sweetened condensed milk (not evaporated)
  • 3/4cup whipping cream
  • 1/2cup Key lime juice or regular lime juice
  • 1teaspoon grated lime peel
  • 4drops yellow food color
  • 1drop green food color
  • Frosting  I found on this website
    Ingredients
    • 1 cup unsalted butter (2 sticks or 1/2 pound), softened (but not melted!) Ideal texture should be like ice cream.
    • 3-4 cups confectioners (powdered) sugar, SIFTED
    • 1/4 teaspoon table salt
    • 1 tablespoon vanilla extract
    • up to 4 tablespoons milk or heavy cream
    Instructions
    1. Beat butter for a few minutes with a mixer with the paddle attachment on medium speed. Add 3 cups of powdered sugar and turn your mixer on the lowest speed (so the sugar doesn’t blow everywhere) until the sugar has been incorporated with the butter. Increase mixer speed to medium and add vanilla extract, salt, and 2 tablespoons of milk/cream and beat for 3 minutes. If your frosting needs a more stiff consistency, add remaining sugar. If your frosting needs to be thinned out, add remaining milk 1 tablespoons at a time.
    Garnish, If Desired
    Fresh strawberries
    Key lime slices

    'Better-than-Cafe-Rio' Shredded Sweet Pork

    Seriously, I'd eat this every day. #1, it's made in the crock pot. Minimal work. I like that. #2, it's delicious! Just as good, if not better than Cafe Rio if you ask me, or my brother, or my brother in-law, or my sister, or my step dad... they all agree. Plus, the dressing is HEAVEN. I LOVE cilantro! Added a little extra. :)


    I borrowed this pic from online. Forgot to take a pic.

    Ingredients:
    • 3 lbs pork (or chicken breasts) *
    • 16 oz bottle of chunky salsa (I used Pace Medium)
    • 1 can Coke (any soda. I've used coke, coke zero, Dr Pepper.. all are yummy!)
    • 2 cups brown sugar
    Place pork in crock pot and fill it 1/2 way up the pork with water. Cook on HIGH for 5 hours. Drain off water. Cut pork in thirds. In blender/processor, mix salsa, sugar, and soda. (just enough so chunks are gone) Pour on top of pork. Cook additional 3 hours on HIGH. Shred pork with forks. Leave on low/warm until ready to serve.

    *If doing chicken, cook in crock on LOW for 6 hours. Then drain water, pour sauce over chicken, and cook an additional 30 minutes to 1 hour. Shred chicken with forks.*


    Dressing:
    • 1 Package Hidden Valley Ranch
    • 1 cup mayo 
    • 1 cup chopped cilantro
    • 2 cloves garlic, chopped
    • 2-4 Tablespoons of LaVictoria Green Taco Sauce 
    • I like to add a little lime juice (opt)
    Mix in a blender/food processor.


    Serve it as a salad, or burrito, or just over rice! Either way, you can't go wrong. Mmmmmmm......


    Lemon Cream Cake

    I found this recipe on pinterest, really where else! It said it was an Olive Garden Lemon Cream Cake.  I love Olive Gardens Lemon Cream Cake.  So Easter Sunday this is what I made.  It did not disappoint.  It was so yummy!!  Everybody loved it!!
    this is the original recipe...you can find it here
    1 white cake mix,prepared
    8 oz. cream cheese, softened
    2 cups powered sugar
    1 cup heavy whipping cream, whipped to stiff peaks
    3 tbsp. lemon juice
    1/2 cup all purpose flour
    1/2 cup powered sugar
    1 tsp. vanilla extract
    4 tbsp. butter
    Directions
    Prepare cake as directed in a 10" round cake pan or 10" round spring form pan.
    Blend cream cheese, powered sugar, and lemon juice together. In a medium bowl, whip heavy whipping cream to stiff peaks. Gently fold into cream cheese mixture and blend by hand. Chill until needed.
    Mix flour and powered sugar in small bowl. Crumble butter in and dribble in vanilla extract. The crumbles should be no larger than pea size. If you have trouble crumbling mixture, chill for a few minutes. Chill until needed.
    After cake is cooled, cut in half. Spread cream cheese mixture, saving 1/2 cup, on bottom half and carefully place top layer back. Spread rest of cream cheese mixture on the sides of cake. Press crumb topping into sides gently. Chill for 3 hours. Cut into 12 pie shaped slices. Makes 12 servings.
     *the only thing I did different is put it into two 9in round pans

    Gooey Cookies and Cream Chocolate Cake Bars

    I made these brownies the other night for a BBQ with my friend and her family, we ate them so fast that I couldn't even get a picture of them.  They were so gooey and delicious...we ate them right out of the pan!! 


    Gooey Cookies and Cream Chocolate Cake Bars

    1 Devils Food Cake Mix
    8 tablespoons (1 stick) unsalted butter, softened
    1 large egg
    1 1/2 cups chocolate chips
    14 ounce can sweetened condensed milk
    14 Oreo Cookies, broken into bite size pieces
    1. Preheat oven to 350 degrees F. and line a 9×13 inch baking pan with tin foil sprayed with non-stick cooking spray.
    2. Place cake mix, butter and egg into a large bowl, mixing to combine. Use your hands, it works much quicker :) Press into prepared baking pan. Top with broken pieces of cookies.
    3. Pour sweetened condensed milk over cookies and top with chocolate chips. Bake for 23-25 minutes, until cooked through. Remove from oven.
    4. After 5 minutes of cooling, run a plastic knife around edges to loosen, this makes it much easier to remove from foil. Let cool completely, remove foil from pan, then cut into squares. I cut off all of the edges before cutting into squares (makes for neater squares), but do whatever you’d like!!

    recipe and picture both come from Picky Palate

    PF Chang's Mongolian Beef

    This was SOOOOO good! Definitely a keeper. It wasn't too hard to make either. Score!
    Recipe and picture found on food.com. The boys ate it all up before I could take my own picture. Yeah, it's THAT good. 

    Ingredients:

    • 2 teaspoons vegetable oil
    • ½ teaspoon ginger, minced
    • 1 tablespoon garlic, chopped
    • ½ cup soy sauce (I used low sodium)
    • ½ cup water
    • ¾ cup dark brown sugar
    • vegetable oil , for frying (about 1 cup)
    • 1 lb flank steak
    • ¼ cup cornstarch
    • 2 large green onions 

    Directions:


    1. Make the sauce by heating 2 tsp of vegetable oil in a medium saucepan over med/low heat.
    2. Don't get the oil too hot.
    3. Add ginger and garlic to the pan and quickly add the soy sauce and water before the garlic scorches.
    4. Dissolve the brown sugar in the sauce, then raise the heat to about medium and boil the sauce for 2-3 minutes or until the sauce thickens.
    5. Remove it from the heat.
    6. Slice the flank steak against the grain into 1/4" thick bite-size slices.
    7. Tilt the blade of your knife at about a forty five degree angle to the top of the steak so that you get wider cuts.
    8. Dip the steak pieces into the cornstarch to apply a very thin dusting to both sides of each piece of beef.
    9. Let the beef sit for about 10 minutes so that the cornstarch sticks.
    10. As the beef sits, heat up one cup of oil in a wok (you may also use a skillet for this step as long as the beef will be mostly covered with oil).
    11. Heat the oil over medium heat until it's nice and hot, but not smoking.
    12. Add the beef to the oil and sauté for just two minutes, or until the beef just begins to darken on the edges.
    13. You don't need a thorough cooking here since the beef is going to go back on the heat later.
    14. Stir the meat around a little so that it cooks evenly.
    15. After a couple minutes, use a large slotted spoon to take the meat out and onto paper towels, then pour the oil out of the wok or skillet.
    16. Put the pan back over the heat, add the water, dump the meat back into it and simmer for one minute.
    17. Add the sauce, cook for one minute while stirring, then add all the green onions.
    18. Cook for one more minute, then remove the beef and onions with tongs or a slotted spoon to a serving plate.


      We had it over rice. YUMMY!!!

    White Chocolate Raspberry Bundt Cake

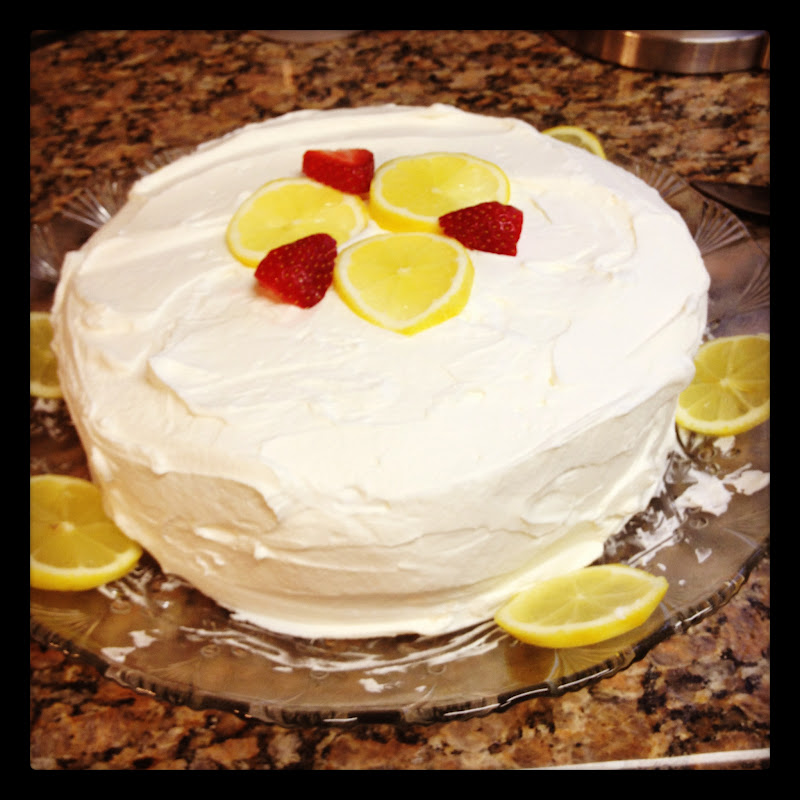
    This cake was so good!  I think that the plate got licked clean!!  I got the recipe from All Things Thrift
    via pinterest.  We couldn't get enough of it!!  I followed the instructions for putting it in the fridge, I made it in the morning and we had it that evening!!
    Preheat oven to 350 degrees

    Instructions:
    1 (Betty Crocker) White cake mix (make as directed)
    Add 1/2 cup applesauce (no cinnamon)
    Add 1 small package of instant vanilla pudding (just the dry mix)
    Mix batter well.

    Now that you have your cake batter mixed up nicely, you need to separate the batter into two bowls. So pour 1/3 (approximately) into another bowl.

    Defrost 1 cup frozen raspberries and mash them up with a fork. I usually do this on a paper plate so that I can mash them easily.
    After the raspberries are nicely mashed, add 1 Tbsp flour and mix.
    Add the mashed berries to the bowl containing 1/3 of the original batter and mix well. Set bowl aside.

    Take your 1 c. melted white chocolate chips and melt them gradually in the microwave. Be careful not to burn the chocolate. I put them into my microwave in a bowl for 30 seconds the first time, and then I stir the chocolate. Then I put it back into the microwave for 10 second increments while stirring in between until the chocolate is melted completely.

    With remaining 2/3 batter add the melted white chocolate. Mix nicely.

    Grease bundt cake pan well (I use "Bakers Joy"). I use a silicone bundt cake pan, and it has a nonstick surface that is fantastic. I have never had it stick!

    After your pan is greased nicely, coat bottom of pan with 1/2 of the white chocolate/cake batter mix.
    Then add dollops of all of your raspberry/cake batter mix to the pan on top of the white chocolate batter.
    Then add the remaining white chocolate cake/batter on top of the dollops.

    Next you need to create the marble look, so make an S pattern through the batter using a skewer or handle of a wooden spoon. Be careful not to touch the bottom of the pan. This will mix the two batters perfectly to create that marbled look.

    Bake 42-45 minutes.
    Let the cake cool in the pan for a bit, then turn it out onto a cooling rack.
    IMPORTANT STEP: Triple wrap the cake in saran wrap and put it in the freezer (yes I said freezer) for 5-7 days (yes I said DAYS and I meant it). (I'll be honest here though, we have only done this part ONCE. We are much too impatient.) So, this is what we do, we place the cake in the fridge until it is COMPLETELY cool. Then I frost the bad boy. After the cake is frosted, I place the cake BACK IN The fridge to cool the frosting again, and then we serve it cold. It is a MILLION times better cold. Don't get impatient and eat it warm. You WILL be disappointed if you do.

    CREAM CHEESE FROSTING RECIPE:
    1 stick softened (NOT melted) butter (1/2 cup)
    1 brick softened cream cheese (8 oz)
    Mix butter and and cream cheese until soft, add 2 tsp vanilla, beat until light and fluffy.
    Add 4 1/2 cups powder sugar, one cup at a time. Beat frosting until smooth. (Oh, and I added a few drops of red food coloring to make the frosting pink, and added a few little sprinkles to make it pretty).

    3 Ingredient Pork Chops

    3 ingredients. Crock pot. That's it. Gotta love an easy dinner. And it was really good! Definitely a keeper.


    Ingredients:
    • Pork chops (can also use chicken)
    • Packet of Ranch Dressing mix
    • Cream of Chicken soup
    • 1 Can of water or another can of C of C soup (I used water this time, and thought the sauce was a little too runny. I plan to use another can of soup next time.)
    1. Put meat in crock pot.
    2. Mix ingredients together and pour over meat.
    3. Cook on low 4-6 hours.

    Oreos

    These cookies are so easy to make, and so delicious! Great for any occasion. This time, just happened to be for Superbowl. This icing is the same as the Sugar Cookies.


    Cookies:
    • 1 box Devil's Food Cake mix (must be DEVIL's FOOD)
    • 2 eggs
    • 3/4 C Shortening
    Frosting:
    • 2 Tbsp Butter
    • 3-4 oz cream cheese
    • 2 C Powdered Sugar
    • 1-2 Tbsp milk


    Directions:
    1. Mix Devil's food cake, eggs, and shortening.
    2. Roll into small balls. 
    3. Bake @ 350 deg 6-10 min. Cookies will flatten and crater.
    4. Match them up and begin to frost the middles. The more frosting the better! :)


    Peanut Butter Fudge

    Peanut butter and chocolate together are HEAVEN in my eyes. There is no better combination in the world! And this is no exception.
    This is quick, easy, and delicious! Great for parties or treats for neighbors and friends. YUM!


    (recipe found at bakerella.com)

    Peanut Butter Fudge

    • 3 cups sugar
    • 3/4 cup margarine
    • 2/3 cup evaporated milk
    • 1 tsp vanilla
    • 6 oz package semi sweet chocolate pieces
    • 7 oz. jar Marshmallow Creme
    • 1/2 cup peanut butter (I like Jif)
    1. Combine 1 1/2 cups sugar, 6 tablespoons margarine and 1/3 cup evaporated milk in a medium pot.
    2. Bring to full rolling boil, stirring constantly.
    3. Reduce heat to medium and continue boiling for 4 minutes, stirring constantly to prevent scorching.
    4. Remove from heat and stir in chocolate pieces until melted.
    5. Add 1 cup (1/2 jar) marshmallow creme and 1/2 teaspoon vanilla. Beat until well blended.
    6. Pour into greased 13 X 9 pan.

    Repeat with remaining ingredients substituting peanut butter and spread over chocolate.
    Then, cool at room temperature and cut into squares.

    Superbowl XLVI sugar cookies!

    It's been a tradition to make sugar cookies for Superbowl. My friend and I would make the cookies for the team we were rooting for. (who of course would always win!) This year's was nice having the two teams have the same colors. But it was still funny to have our NY fans not eat a NE-decorated cookie, and NE fans not want to eat NY cookies. Ha ha!
    We usually go all out on decorating, having cheerleaders and putting players names or "blind refs!" This year I kept it more simple. (mainly cuz I didn't have the time) My Patriots logo needs some work, but I don't really care cuz I was rooting for NY anyway. :)

    I used THIS Sugar Cookie Recipe. SO GOOD!

    Lemon Raspberry Layer Cake

    Lemon Raspberry Layer Cake


    For the Cake
    2 1/4 cups cake flour
    1 tablespoon baking powder
    ½ teaspoon salt
    1 ¼ cups whole milk or buttermilk
    4 large egg whites
    1 ½ cups sugar
    2 teaspoons grated lemon zest
    1 stick (8 tablespoons or 4 ounces) unsalted butter, at room temperature
    ½ teaspoon pure lemon extract
    For Finishing
    2/3 cup seedless raspberry preserves stirred vigorously or warmed gently until spreadable

    Getting Ready
    Center a rack in the oven and preheat the oven to 350 degrees F. Butter two 9 x 2 inch round cake pans and line the bottom of each pan with a round of buttered parchment or wax paper. Put the pans on a baking sheet.
    To Make the Cake
    Sift together the flour, baking powder and salt.
    Whisk together the milk and egg whites in a medium bowl.
    Put the sugar and lemon zest in a mixer bowl or another large bowl and rub them together with your fingers until the sugar is moist and fragrant.
    Add the butter and working with the paddle or whisk attachment, or with a hand mixer, beat at medium speed for a full 3 minutes, until the butter and sugar are very light.
    Beat in the extract, then add one third of the flour mixture, still beating on medium speed.
    Beat in half of the milk-egg mixture, then beat in half of the remaining dry ingredients until incorporated.
    Add the rest of the milk and eggs beating until the batter is homogeneous, then add the last of the dry ingredients.
    Finally, give the batter a good 2- minute beating to ensure that it is thoroughly mixed and well aerated.
    Divide the batter between the two pans and smooth the tops with a rubber spatula.
    Bake for 30-35 minutes, or until the cakes are well risen and springy to the touch – a thin knife inserted into the centers should come out clean
    Transfer the cakes to cooling racks and cool for about 5 minutes, then run a knife around the sides of the cakes, unfold them and peel off the paper liners.
    Invert and cool to room temperature, right side up (the cooled cake layers can be wrapped airtight and stored at room temperature overnight or frozen for up to two months).
    To Assemble the Cake
    Using a sharp serrated knife and a gentle sawing motion, slice each layer horizontally in half.
    Put one layer cut side up on a cardboard cake round or a cake plate protected by strips of wax or parchment paper.
    Spread it with one third of the preserves.
    Top with another layer, spread with preserves and then do the same with a third layer
    Place the last layer cut side down on top of the cake and frost with whipped cream.

    Stuffed Zucchini

    This would probably have been a better idea to do in the summer when there are zucchinis (as opposed to the mini ones I used in the middle of winter). But for some reason I was craving this, and found it via pinterest (yet again!) on Kayotic Kitchen. This blog is amazing! It has some great recipes and step by step instructions. I'm also in love with the site because it gives me tips on how to take better pics of food. YAY! 

    So again, a borrowed picture. :) Doesn't it make you salivate? (both the food and from photography point)


    Stuffed Zucchini

    Ingredients:

    • 1 tbsp sour cream
    • 1/4 to 1/2 tsp salt
    • 1/4 tsp curry powder
    • 1/2 tomato
    • 1 tsp thyme
    • 2 zucchinis
    • 1 onion
    • cheese (aged)
    • pepper
    • bacon (optional) - this is canadian bacon, aka ham, that they/I used. Regular would be good too! 

    Directions:
    • wash zucchini. Slice in half, length-way. Spoon out the 'guts', leaving some still around the edges, making a boat.
    • Chop onions. Saute in 1 Tbsp oil. When close to done, add 1/4 tsp curry powder and cook another 30 seconds. (no longer or curry turns bitter)
    • Cook a few slices of ham, and drain on paper towel.
    • In bowl, mix chopped tomatoes, chopped 'zucchini guts', thyme, salt, sour cream, and crumbled bacon.
    • Put zucchini in a baking dish or cookie sheet. Start stuffing zucchini!
    • Top with cheese. Throw them in the oven.
    • Bake @ 400 deg for about 20 minutes
    • Sprinkle with parsley if desired. YUM!

    Monterey Chicken

    It's been a while since I've posted. I've been busy with school, work, and family things. Haven't had much time to cook. I miss it. I have a few things I've made to post, and a couple on deck, so hopefully I can get it together and get them done!

    This meal was quite easy and very delicious! I got the recipe from a blog called all things simple via pinterest. (which I am new to, but so far love) I borrowed this picture from there as well. I REALLY need to learn how to take better pics of food. Til then....


    MONTEREY CHICKEN
    • 4 boneless, skinless chicken breasts
    • 1/4 c. bar-b-que sauce (I used Bull's Eye)
    • 1/4 c. real bacon bits
    • 1 c. colby and jack cheese, shredded
    • 1 14 oz. can Rotel tomatoes, drained (canned with green chilies added)
    • sliced green onions
    • pepper


    Preheat oven to 400 degrees. Pound out chicken breasts to flatten. Season with pepper. Grill chicken until no long pink (used our George Foreman grill) and place on baking sheet covered with foil. Top each chicken breast with one tablespoon bar-b-que sauce, 1/4 c. cheese, 1/4 c. tomatoes, green onions, and one tablespoon of bacon bits. Place in oven and bake until cheese is melted (about 5 minutes).

    Baked Crispy Chicken Parmesan

    This chicken was so good!  Both my kids loved it, my husband said i could sell it at a restaurant..he loved it!  Defiantly a keeper!
    Baked Crispy Chicken Parmesan Recipe:
    (Recipe from All Recipes)
    Ingredients:
    Vegetable cooking spray
    2 cups Pepperidge Farm® Four Cheese and Garlic Croutons (or your favorite croutons)
    4 skinless, boneless chicken breasts
    1 egg, beaten
    1 cup marinara sauce, heated
    1/4 cup shredded mozzarella cheese


    Directions:
    Preheat oven to 375 degrees F. Spray baking sheet with vegetable cooking spray. Place croutons in zipper plastic bag. Close and crush with rolling pin until crumbs form.
    Dip chicken into egg. Coat with crumbs. Place chicken on prepared baking sheet. Spray chicken with vegetable cooking spray.
    Bake 20-30 minutes or until chicken is done. Spoon pasta sauce over chicken and sprinkle with cheese.

    Chicken Enchilada Puffs

    My kids loved these!  I have made them twice!  they make a great dinner but you have to make a whole bunch cause they eat a lot!!


    Recipe: Chicken Enchilada Puffs

    Summary: This recipe takes something as good as chicken enchiladas and turns them into finger food!

    Ingredients

    • 1 package jumbo crescent rolls
    • 3 oz cream cheese
    • 1/2 cup Mexican blend shredded cheese
    • 3/4 cup cooked chicken (diced or shredded)
    • 1/3 cup enchilada or taco sauce
    • 2 teaspoons enchilada or taco seasoning mix
    • 1/4 cup Mexican shredded cheese for sprinkling

    Instructions

    1. Preheat oven to 375° and line cookie sheet with foil and spray with no-stick spray
    2. Place cream cheese and 1/2 cup Mexican cheese in small bowl and microwave for about 30-40 seconds, to soften.
    3. Add seasoning mix, sauce and chicken to cheese mixture and stir until combined.
    4. Unroll crescent rolls on prepared pan.
    5. Scoop 1 large heaping tablespoon of chicken mixture into the center of the two short ends of the crescent roll.
    6. Pull outer corners of the crescent roll over the chicken mixture, and then pull the long end over, completely enclosing filling.
    7. Sprinkle tops of puffs with additional shredded Mexican cheese.
    8. Bake for 15 minutes, or until golden brown.

    Mini Pizza Muffins

    These little pizza muffins were so good!  My kids ate them up!  We loved them! 
    
    Pepperoni Pizza Puffs
    • 3/4 cup flour
    • 3/4 teaspoon baking powder
    • 1 tablespoon Italian seasoning
    • pinch of salt (my addition, optional)
    • pinch of red pepper flakes (my addition, optional)
    • 3/4 cup whole milk
    • 1 egg, lightly beaten
    • 1 cup shredded mozzarella cheese
    • 1/4 cup grated Parmesan cheese
    • 1 cup cubed pepperoni
    • 1/2 cup store-bought pizza sauce
    1. Preheat the oven to 375 degrees. Grease a 24-cup mini-muffin pan. In a large bowl, whisk together the flour, baking powder, Italian seasoning, salt and red pepper flakes (if using) ; whisk in the milk and egg. Stir in the mozzarella, Parmesan and pepperoni; let stand for 10 minutes.
    2. Stir the batter and divide among the mini-muffin cups. Bake until puffed and golden, 20 to 25 minutes.
    3. Meanwhile, microwave the pizza sauce until warmed through. Serve the puffs with the pizza sauce for dipping.

    got the recipe here

    Mini Mexican Pizza

    Its been awhile... Thanks to pinterest, I have lots of fun new things I have tried...hopefully I can get back on the ball!!
     Here are some Mini Mexican Pizzas.  Everybody loved them!!

    Ingredients:

    • 3-4 large whole wheat tortilla’s, or enough to cut out 12 small circles (I prefer low carb/high fiber tortillas)
    • 1 cup lean ground turkey, cooked (OR lean ground beef OR 1 cup Morning Star Meatless Crumbles)
    • 1/2 cup salsa of choice (I used one with corn)
    • 2 tsp dry taco seasoning
    • 1/2 cup low fat refried beans
    • 1/2 cup low fat shredded mexican blend or 2% cheddar cheese
    • Optional Toppings: sliced black olives, shredded lettuce, low fat sour cream, chopped tomatoes

    Method:

    1. Preheat oven to 425 degrees. Spray a 12 count muffin tin with non-stick cooking spray.
    2. Start by laying each tortilla out individually on a flat surface, and use an empty can, glass cup, or cookie cutter to cut 3-4 medium circles out of each wrap.
    3. Press each wrap circle into muffin tin using your fingers. (Note: it doesn’t have to cover the entire side of the tin, it should just fit snuggly!)
    4. Meanwhile, in a small bowl, mix together the ground meat, salsa, taco seasoning, and refried beans. Stir until well combined.
    5. Scoop 1/8th cup of meat mixture into each wrap.
    6. Top with shredded cheese, (dividing evenly between each pizza), and olives if desired
    7. Bake in pre-heated oven for 12-15 minutes, or until cheese is melted.
    8. Wait for mini Mexican pizzas to cool, and remove from muffin tin using a fork or knife. Pizza’s should pop out with ease!
    Serve with a side of salsa, low fat sour cream, chopped tomatoes, and/or shredded lettuce if desired!

    Caramel Stuffed Apple Cider Cookies

    Found these on KSL and had to give them a try!  I liked them warm from the oven best!

    Caramel Stuffed Apple Cider Cookies
    Ingredients:
    • 1 c. softened butter
    • 1 c.granulated sugar
    • 1/2 t.salt
    • 1 box (7.4 oz) Alpine Spiced Apple Cider Instant Original Drink mix -not sugar free- all 10
    • packets (I found this in my grocery store near the hot chocolate mixes.)
    • 2 eggs
    • 1 t. vanilla extract
    • 1 t. baking soda
    • 1/2 t. baking powder
    • 1 t. ground cinnamon
    • 3 c. all purpose flour
    • 1 bag Kraft Caramels (14 oz)
    Method:
    · Preheat oven to 350° F. Line cookie sheets with parchment. (You really need the parchment!)
    · In a small bowl whisk together flour, baking soda, baking powder and cinnamon.
    · With your mixer (or an energetic spoon) cream together butter, sugar, salt and all 10 packages of apple cider drink mix powder, until light and fluffy.
    · Beat in eggs, one at a time. Add vanilla and mix well.
    · Gradually add flour mixture to butter/egg mixture. Mix until just combined.
    · Refrigerate for about an hour. (If you're really impatient you don't have to do this, but it makes it so much easier to work with.)
    · When you are ready to bake, unwrap your caramels.
    · Scoop out cookie dough ball about the size of a walnut. (I used a rounded cookie scoop-full. My scoop holds about a Tablespoon.)
    · Flatten the ball of dough slightly in the palm of your hand. Press the unwrapped caramel into the center of your dough and seal the dough around it, covering it completely. Place on parchment covered cookie sheets 2 inches apart.
    · Bake 12-14 minutes, or until very lightly browned around the edges. Please don't over- bake! Once the cookies are done, slide the parchment off of the baking sheet right out onto the counter. Allow cookies to partially cool on the parchment. When cookies are cool enough to be firm but still slightly warm, carefully twist off of parchment and allow to finish cooling upside down (either on the parchment or on a rack.) If you forget about them and they cool too much and stick to your parchment, put them into the freezer for a few minutes and they'll pop right off.
    · Yield: about 4 dozen, depending on how large you make your cookies (or how many caramels have been snitched out of your bag before you begin.) Store in an airtight container.

    Muddy Buddy Brownies


    I forgot to take a picture so I took it off her website!
    I found this recipe and had to try it!!  I love chex muddy buddies!!   

    INGREDIENTS
    8×8 pan of brownies, baked and cooled (I used a Ghirardelli mix, which makes a small pan. If you want to use a box/recipe that makes a large pan, just double the topping)**
    1 stick butter, softened
    1/2 cup peanut butter
    1 teaspoon vanilla
    2 cups powdered sugar
    2 TBS milk
    2 cups semisweet chocolate chips
    1 stick butter
    About a cup of powdered sugar

    In the bowl of a mixer, beat 1 stick of butter, peanut butter, and vanilla until combined and smooth. Add powdered sugar and beat on medium high until combined. Add milk and beat on high for about a minute. Spread on pan of brownies and refrigerate for a couple of hours, until frosting is cold and firm.

    Place 1 stick of butter and chocolate chips in a large microwave safe bowl. Melt in the microwave, stopping to stir at 20 second intervals. Once melted and smooth, cut brownies into squares and dip the top half of each in the chocolate. Place on a baking sheet and spoon powdered sugar over the top.

    **I used a 9x13 brownie mix and I doubled the toppings, it was too much.  I would just use the normal toppings or 1 and half it.  but double was way more then was needed!!

    Oven Dogs!

    Hot Dogs!!!  not my most favorite food.  Over a open fire I love them any other way I turn up my nose!!  But when I saw this recipe I decided to give it a try.  It was really good.  Everybody loved it!! 
    Oven Dogs

  • 8 hot dog buns


  • mayonnaise


  • 8 all beef hot dogs (I like Ball Park Franks)


  • 1/2 cup sweet relish


  • 1 Tbsp butter


  • 1/2 medium onion, diced


  • 1 (15 oz) can of chili or 2 cups of your own chili


  • 1 cup shredded cheddar cheese


    1. Spread a coating on mayonnaise on the inside of the hot dog buns.
    2. Fill the buns with the hot dogs and place in a 9x 13 inch baking dish. You will have to squeeze then into the dish.
    3. Top each dog with a Tablespoon of the relish.
    4. In a pan, saute the butter and onion until tender. Add the chili to the onions and stir until well combined.
    5. Top the dogs with the chili and sprinkle with cheddar cheese.
    6. Cover with foil at bake at 350 degrees for 40 minutes
    *I left out the relish, we don't like that stuff around here!!

    Kitty Litter Cake

    Wow. It's been a long time since I've posted. It makes me sad that I've been so busy that I haven't had any time to cook. I miss it.

    This weekend my MIL asked if I would make THIS cake for our Halloween party, and to celebrate my nephew's birthday. I laughed, and couldn't turn it down. It was a hit at the party, and believe it or not, quite delicious too!

    Ingredients:

    • 1 brownie mix
    • 1 can Cream Cheese frosting
    • tootsie rolls - small bag
    • 1 bag animal crackers or Keebler Sandies shortbread cookies
    • green food coloring
    • 1 small cat litter pan (never been used - very important)
    • 1 cat litter scoop (also never been used - also very important)
    • parchment cooking paper (or saran wrap) to line the litter box


    Directions:

    1. Make brownies according to instructions on the package. Make them to fit the 9 X 13 pan.
    2. Line the litter box with parchment cooking paper. (Litter boxes are not treated to hold food, so be sure to line it)
    3. After brownies are cooled, break into large chunks and place into cat litter pan.
    4. Spread frosting onto the brownies, making sure none of the brownies are exposed. (I melted mine in microwave for 30-40 seconds and then poured it over brownies)
    5. Put some animal crackers or shortbread cookies in a baggie and smash into tiny bits. You don't want to have a fine sand but a bit chunky. (I used a rolling pin)
    6. Take a small amount of crushed cookies and set aside in a small baggie.
    7. Make sure you have enough crushed cookies to cover the frosting. Spread the cookies on the frosting.
    8. Take the amount of cookies that you set aside and drip a few drops of green food coloring into the baggie. Seal and shake up. Try to color all the chunks in this baggie. Keep adding more food coloring until most of the chunks have some kind of green on them. Doesn't have to be perfect.
    9. Spread the green colored cookies in with the others.
      (If you have cats, you probably have a good idea where this is going. If you don't have cats, you want the green to be spread sparsely around. Try not to have big areas of just green.)
       10. Unwrap a few tootsies at a time, place on a plate, and microwave for a few seconds (7-10) just til they are soft. Pinch, twist, and mold into you-know-what. I believe mine were 3 small tootsies for each 'one.'


    DIG IN and ENJOY!

    Carrot Zucchini Bars with lemon cream cheese frosting

     These Zucchini bars have become a favorite.  I have even been leaving out the carrot and just adding more zucchini!  The lemon in the frosting gives it the perfect taste!!
     
    Carrot and Zucchini Bars with Lemon Cream Cheese Frosting
    • 2 eggs, slightly beaten
    • 3/4 cup packed brown sugar
    • 1/2 cup canola oil
    • 1/4 cup honey
    • 1 tsp vanilla
    • 1 1/2 cups shredded carrot
    • 1 cup shredded zucchini
    • 1/2 cup chopped walnuts
    • 1 1/2 cups all-purpose flour
    • 1 tsp baking powder
    • 1/2 tsp ground ginger
    • 1/4 tsp baking soda
    Lemon Cream Cheese Frosting
    • 1 (8 oz) pkg reduced fat cream cheese
    • 1 cup powdered sugar
    • 1 1/2 tsp lemon zest
    1. Preheat oven to 350 degrees F. In a large bowl, whisk together the eggs, brown sugar, oil, honey, and vanilla.  Don’t worry about clumps of the brown sugar, those will dissolve as it sits while you prepare the remaining ingredients.  Then fold in the carrot, zucchini, and walnuts
    2. In another bowl combine add the flour, baking powder, ginger, and baking soda.  Whisk to blend together.
    3. Add to flour mixture to the wet mixture. Stir just until combined. Spread batter into an ungreased 13x9x2-inch baking pan.
    4. Bake about 25 minutes or until a toothpick inserted in center comes out clean. Cool completely in pan on a wire rack.
    5. Once the cake is cooled prepare the frosting.   In a medium mixing bowl, beat the frosting ingredients with an electric mixer on medium speed until fluffy.  Spread or pipe the frosting over the cooled bars.  Makes 36 bars.
    Related Posts Plugin for WordPress, Blogger...